DIY Worm Bin
Do you want a DIY worm bin? I've created an extensive how to build a worm bin tutorial. You don't need fancy compost bins to start a worm farm.
In addition to learning how to build a worm bin I show what foods to add and not to add (only in the video) and I talk a bit about the materials you're putting in.
If you want to learn all about worms and raising them then read the Free Worm Farming Guide. Okay now check out the tutorials and get started.
Attention
Before you make this DIY Worm Bin you may want to see other types of worm farming systems submitted by people like you.
and remember to Buy Worms right here from us after your bin is ready.
DIY Worm Bin - Text Tutorial
What you will need:
1. Two 18 gallon Rubbermaid bins. Don't go any smaller if you can. Give your worms some room.
2. Two support blocks of any kind 2-4 inches high to put in the bottom bin.
3. A power drill and 1/8 up to 1/4 inch drill bit
4. Cardboard, newspaper, and kitchen scraps
5. Handful of fine soil (this introduces different microbes until you have worms)
6. Water
Step #1
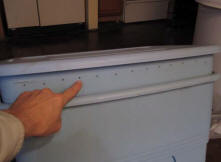
First begin by drilling holes into bin #1.
You will be drilling in three different locations. Start on top of the lid.
Next, drill holes around the sides of the bin about 1 inch from the top at 6 inch spacing.
Next, drill holes on the underneath just as you did on top of the lid. If there are any places on the bottom of the bin where water will pool, then go ahead and drill a few holes in that area.
The holes are a little closer in the picture but the drill bit was smaller. All it needs is a few holes. The gas expels very slowly. so there is no need to get crazy.
Step #2
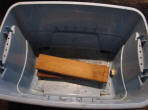
Place the support blocks into bin #2.
Place bin #1 into bin #2.
Step #3
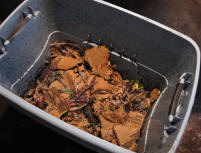
Tear up all the pieces of cardboard, shredded newspaper, etc... and fill bin #1 to about 4 inches. This is the first layer of bedding.
Next, add a small layer of kitchen scraps and sprinkle a teaspoon of soil all around. You want to maintain around a 20:1 Carbon to Nitrogen ratio. This isn't rocket science.
Don't be concerned about getting the recipe exact. The soil is for the worms gizzards to help grind the food. Add plenty of minerals for nutrition. Worm's gizzards will also benefit from it.
Minerals can be a number of different kinds but stay away from the caustic minerals. It will be certain death to your worms. Covered in my Revolution book.
Beneficial minerals include: AG lime, Azomite, rock dust, Diatomaceous earth, etc... In my book I list 19 minerals.
Next, add another layer of bedding, kitchen scraps and soil. Now one more layer of bedding. Be sure that it covers the kitchen scraps well. You don't want it to smell too badly when you lift the lid.
Remember, freezing and thawing the scraps will allow the food to break down faster.
Step #4
Just add water. This stage is not too critical on the amount of water since you will not be implementing your worms yet. The water will drain into the bottom bin sufficiently and the soil you added will serve as a catalyst to activate the microbial community.
Go ahead and buy composting worms now. Remember, most suppliers like us don't ship until Monday to ensure delivery so they're not sitting at the parcel company over the weekend.
If you've already jumped the gun and have your worms, then set them free. I mean in your worm bin of course.
Note:
It is preferred to let the food get warm (if it even does) and decay before introducing the worms to the bin. But if you only put in a very small amount of kitchen scraps it shouldn't get too warm. But this depends on the type of scraps you put in.
Holding off on adding kitchen scraps to the bin is actually not a bad idea until your worms have settled in. This keeps the bin from potentially getting too hot, anaerobic, wet and acidic.
Keep to the "KISS" method and just add a small handful of scraps in the beginning.
Step #5
Add the worms after waiting 1 to 2 weeks (preferred).
Note:
Don't be too concerned if they start crawling all over the place and maybe outside the bin a little bit they're just trying to get adjusted to their surroundings for the first couple of days.
They are stressed out from the journey and don't know where their home is.
Hint:
Leave the light on in the room or put a small light near but not to close to the worm bin if it's a hot bulb. In time your worms will go right down into the bedding if not immediately.
This completes the DIY worm bin text tutorial.
If you've found this DIY Worm Bin tutorial helpful please share it with others who would like to know how to build a worm bin.
DIY Worm Bin Video Tutorial.
Watch an old but great video then go
Brian's Beast Plans
Get plans to build a unit like this from someone I really trust. |
