Continuous Flow Through Bin
by Egg Bear
(Ireland )

Continuous Flow Through Worm Bin
The reason I started this bin was because my partner wanted to compost the leftovers from the kitchen.
As I had been farming worms for about a year and had gained some good ideas from the internet, I decided I liked the idea of a continuous flow-through bin, as it would make harvesting very easy.
The castings are used on the shrubs and flowers we have in our home. I do have other bins which I put only organically grown materials into, as the castings are used for our fruit and vegetables.
The bin cost virtually nothing to make ( I had bought the bamboo the previous year for about 2 euro) as I used materials that were at our home. It took less than an hour to make.
Yes it appears a slightly crude design, but I find it works very well. The old wheelie style bin belonged to the previous house owner and the piping that I used had been lying in a ditch at the end of the garden.
I made the piping a bit more rigid by putting the bamboo that I had through the centre. The worms were also sourced free from a manure pile at a local equestrian centre.
*Editor's note*
Does this give you guys any ideas for free worms? :)
At the moment the bin is in a small shed but I plan to keep it out doors once I have an intended area cleared for it. Our winters here do not get very cold so I feel the mass of the bin will be enough to keep the worms insulated. As it has wheels it makes it very easy for one person to move it about.
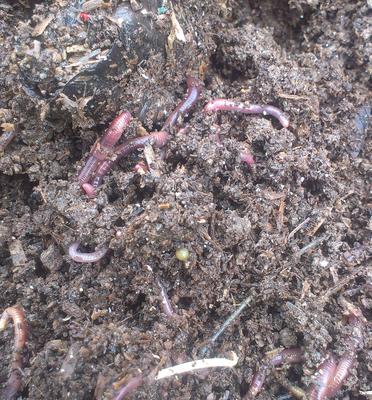
The bin has Red Wigglers or Eisenia Fetida worms. In the beginning there were only a few hundred but the population is increasing all the time. The bin is about 4 months old and there are well over a thousand worms now and there are cocoons and babies everywhere.
At first I wasn't sure if the worm bin would be able to cope with the amount of food being added.
In the photos you can see the small bin we fill - we add a full one every week. I was pleasantly surprised to see the worms have no problems dealing with what I throw at them.
What I feed them are the leftovers from the kitchen. I do freeze them in a large lunch box before adding to the bin to kill fruit flies. The main bedding is aged horse manure and occasionally I add some to the top to keep the fruit flies at bay.
Harvesting the castings is a very easy process.
Once in a while I check the underneath to see what the castings look like. If I feel they are ready, I take out an amount until I start to find worms. Someone did point out before that I should have made the piping at the bottom run from back to front, as they said the harvesting process would be easier.
In my opinion I find it easier working from side to side. I only need to stretch to reach the back of the bin and when this is done, the rest of the harvesting is plain sailing. The castings are then added to plants that look like they are in need of some nurturing.
I would not change the design of this bin. In fact I will be making a few more. The working height is perfect. There is plenty of room underneath to harvest the castings. Because I keep the moisture level of the bin in good check, there is not any leachate at the bottom. The portability is great and the worms appear to love it.
Comments for Continuous Flow Through Bin
|
||
|
||
|
||
|
||
|
||
|
||
|
||
|
||
|
||
|
||
|
||
|
||
|
||
|
||
|
||
|
||
|
||

